Here are all the materials needed to make your donut. 2 sheets of wool felt in different shades. I only work with pure wool, no synthetic but I guess that you can use whatever you want. Different shade embroidery floss for the sprinkles, a pair of sharp scissors, a circle of paper as template (mine was 3"), some pin needles as well as a medium size needle and some wool for stuffing.
Step 1: Pin the paper circle to your first sheet of wool felt and cut around. Do the same thing for the other color. Ps: You will need two light circles of wool to make the two sides of your donut.
Step 2: Put two circles of wool felt on top of each other
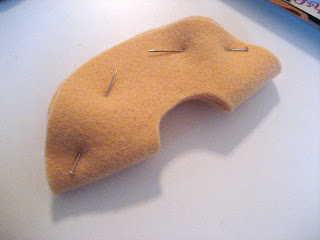
Step 3: Then fold in the center and pin them together leaving the center free for cutting. Cut the center as if you were cutting a circle. Your are now making the center of the donut.
Step 4: Repeat Step 2 and 3 with the darker felt using one of the felt circles that you just have made.
Step 5: Start by making a knot with the embroidery floss that matches the most your wool felt. Start stitching from the center, placing the knot inside the donut.
Step 6: Place both wool felt circles together and start stitching OVER the two layers.
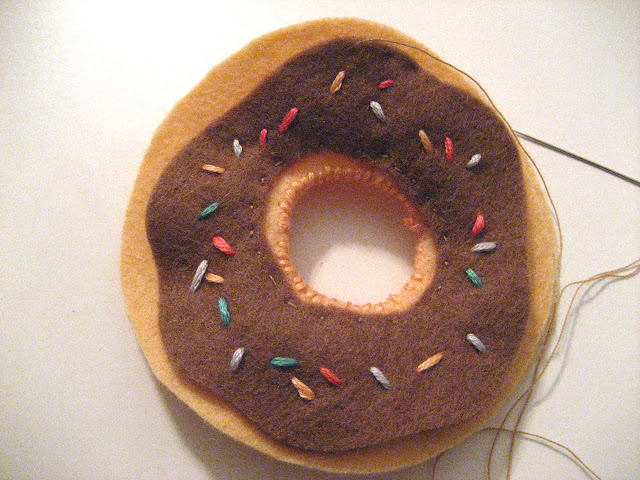
Step 7 & 8: Cut your darkest felt to imitate the icing shape and start sewing the sprinkles. You can use beads but I did it with the cotton instead. Make all knots on the hidden side of the felt.
Step 9: With a matching cotton thread start sewing the icing to the donut.
Step 10 & 11: Start stitching the outer part of the donut using the same OVER stitch as shown in Step 6. Leave a zone unstitched so you can stuff the donut. Here with pure wool.
Step 12: Finish stitching and make a knot. Cut thread right after knot.
Here is a picture of the back. Nothing's perfect in Handmade but that's why we appreciate it more. I do!
Taa-daa!!!


Hey there
ReplyDeleteHope all is well, I just wanted to tell you I am still very happy with the beautiful garlands you sent me last year ;) Got them hanging in my kitchen now for X mas ;) http://vosgesparis.blogspot.nl/2012/12/christmas-moodboard.html To bad I didn't spot your awesome advent calender before as I did a post about advent calenders before
You rock !
From Amsterdam with LoveX
Desire
Hi Desiree! I thought about you after I made the calendars but I was so busy that I didn't take the time to write you. I already have an other one in my mind and it will be black or white. This time I'll keep you posted;)
ReplyDeleteMy little garlands have been doing very well and are now Sold Out!! :))) Thank you for dropping a line here and for all the sweet compliments.
Happy Holidays Desiree♥